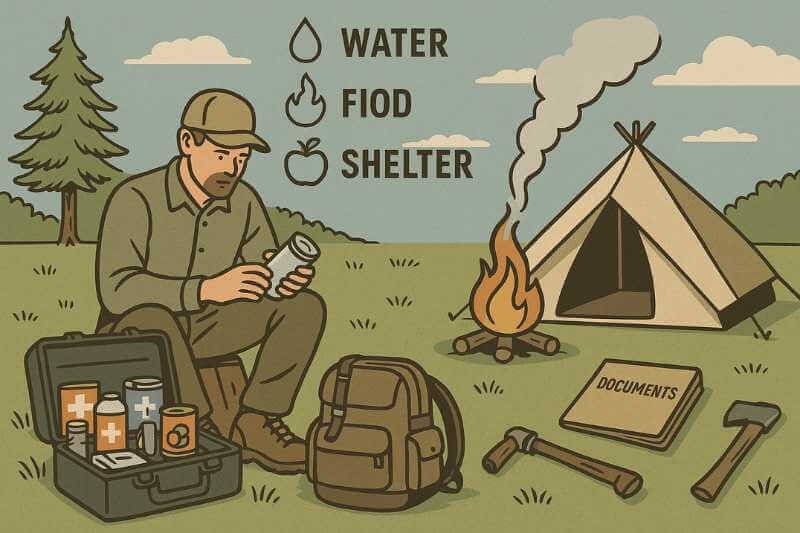
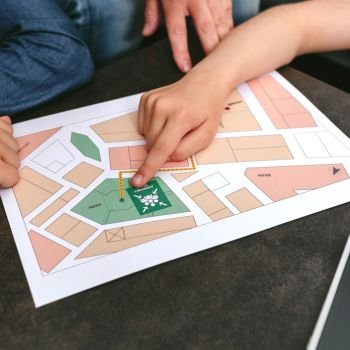
In every crisis, your chances of survival increase exponentially when you’re prepared. And that preparation starts with one crucial item: your emergency kit. Whether it’s a natural disaster, civil unrest, grid failure, or evacuation alert, having the right gear within arm’s reach can mean the difference between chaos and control. In this guide, we break down the emergency kit essentials you need to build a reliable, adaptable, and crisis-proof setup.
Why Every Household Needs an Emergency Kit — No Exceptions
Too many people still believe that disasters happen “elsewhere.” That illusion can cost lives. In reality, emergencies are rarely predictable—and when they strike, supply chains dry up fast. Grocery shelves empty in hours. Gas stations shut down. Communication falters. That’s why experts from FEMA to the Red Cross insist on one principle: every person should have an emergency kit ready to go.
But what should that kit actually include? And how do you tailor it for your specific risks and household?
Let’s start by understanding the foundations.
🧱 The Core Components: Building the Foundation of Your Emergency Kit
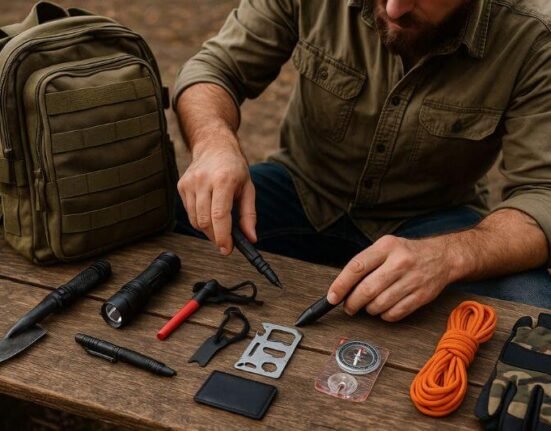
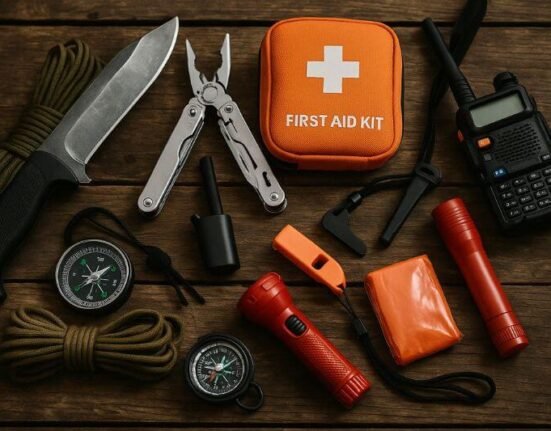
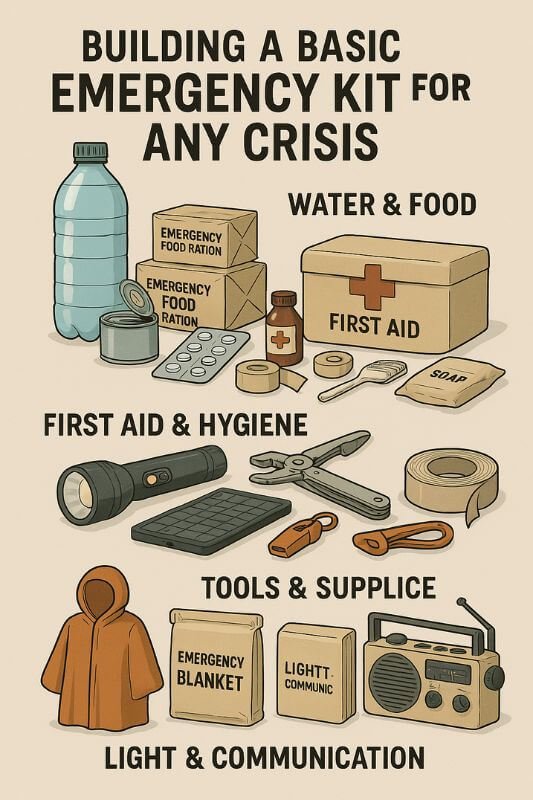
You don’t need military-grade gear or a thousand-dollar budget. What you need is intentionality. The best emergency kits are compact, lightweight, modular, and customized. Here’s a breakdown of the core components that should be in every basic kit:
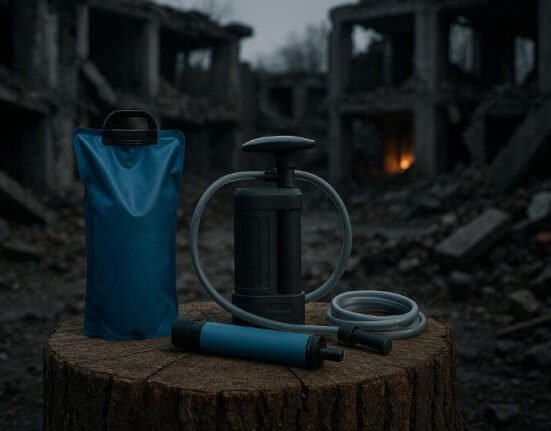
🧃 1. Water Supply and Filtration
- 3 liters per person per day, minimum.
- Store bottled water in BPA-free containers.
- Include compact filters like LifeStraw or Sawyer Mini.
- Add water purification tablets or drops as backup.
💡 Tip: Consider collapsible water bladders for portability and long-term storage tanks for shelter-in-place scenarios.
🍞 2. Emergency Food Rations
- Minimum: 72-hour supply per person.
- Opt for long-shelf-life options: MREs, freeze-dried meals, energy bars.
- Rotate stocks every 6–12 months.
- Add manual can opener and compact utensils.
📝 To retain energy and focus under stress, prioritize high-calorie, low-prep meals.
🩹 3. First Aid and Hygiene
- Pre-packaged first aid kit, upgraded with:
- Extra gauze, burn cream, antiseptics, gloves
- Tweezers, trauma shears
- Include prescription medications (minimum 7 days)
- Add personal hygiene items:
- Toothbrush, soap, feminine hygiene
- Hand sanitizer, wet wipes, toilet paper
🔦 4. Lighting and Power
- Hand-crank flashlight (no batteries needed)
- Headlamp with spare batteries
- Solar charger or power bank for devices
- Glow sticks (safe for kids, visible at night)
🧥 5. Clothing and Protection
- 1 set of all-weather clothes
- Thermal blanket (Mylar)
- Work gloves
- Poncho or waterproof layer
🧠 Cold and wet conditions kill fast. Your clothing choices matter more than you think.
🔪 6. Tools and Equipment
- Multi-tool (Leatherman, Gerber, etc.)
- Duct tape (emergency repairs, sealing gaps)
- Paracord (100 feet)
- Emergency whistle
- Small notepad + pencil
📻 7. Communication and Navigation
- NOAA weather radio, preferably hand-crank or solar
- Map of your region + emergency contact list
- Emergency phone with preloaded numbers + SIM
📁 8. Identification and Documents
- Waterproof pouch with:
- Copies of IDs, insurance, prescriptions
- Emergency plan & maps
- Recent family photo (for missing persons)
⚠️ Common Mistakes When Packing an Emergency Kit
Even the most well-intentioned survivalist can overlook basics or pack in a way that causes more harm than good.
Here are the top 5 mistakes to avoid:
- Overpacking – A 60-pound bag is a liability, not an asset.
- Forgetting water filtration – Stored water isn’t always enough.
- No rotation plan – Expired food and meds are useless.
- Generic kits – Off-the-shelf kits often lack personalization.
- Neglecting comfort – A deck of cards or small book helps reduce panic.
✅ Emergency Kit Checklist (Basic 72-Hour Version)
| Item Category | Must-Have Contents |
|---|---|
| Water & Purification | 3L/day/person, filter straw, purification tablets |
| Food | 3-day supply, canned food, energy bars, utensils |
| First Aid | Basic first aid kit + personal meds |
| Light & Power | Flashlight, headlamp, solar charger |
| Clothing | 1 set, gloves, poncho, emergency blanket |
| Tools & Multiuse Gear | Multi-tool, duct tape, whistle, paracord |
| Communication | NOAA radio, map, emergency contacts |
| Documents | Copies of ID, plan, family photo |
🧩 Customizing Your Kit for Different Scenarios
The beauty of a well-structured emergency kit is that it can be adapted. Here’s how to upgrade or tweak your base kit based on different types of emergencies:
🌪️ Natural Disasters (Earthquake, Hurricane, Flood)
- Add crowbar or small axe for debris
- Waterproof dry bags for electronics
- Floating flashlight + rain poncho
🔥 Urban Unrest or Evacuation
- Include respirator masks (N95 or above)
- Add cash (small bills)
- Backup burner phone
🧊 Cold Climate Adaptation
- Extra Mylar blankets
- Hand warmers
- Insulated gloves + beanie
🧠 Your environment shapes your kit. One size doesn’t fit all.
From Everyday Carry to Go Bag: Adapting Your Emergency Kit to Real-Life Scenarios
Emergency kit essentials aren’t just about the gear—they’re about the mindset. Survival isn’t static. A kit that’s perfect for sheltering in place won’t help much during an evacuation. The gear you need in a wildfire is different from what you’d need in a cyber blackout. That’s why adaptability is the survivalist’s greatest strength.
This section is your field manual for transforming your kit to match different modes of crisis—without overcomplicating things or overloading your pack.
🎒 1. The Modular Kit Approach: Think in Layers
A good emergency setup is not just one bag—it’s a layered system. This method gives you flexibility, lightens your load when needed, and ensures you’re not caught off guard if a crisis escalates.
Here’s how to structure your gear:
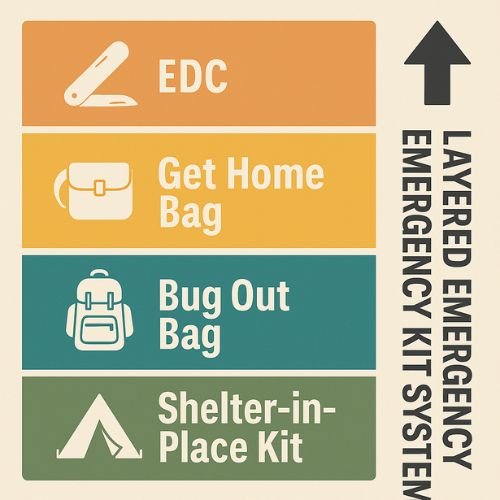
✅ Level 1: Everyday Carry (EDC)
- Small essentials you carry daily
- Purpose: immediate survival & navigation
- Example contents:
- Multitool or mini blade
- Water purification tabs
- USB emergency phone charger
- Emergency whistle
- Compact flashlight
✅ Level 2: 24-Hour Kit (Get Home Bag)
- Stays in your car, office, or backpack
- Purpose: get home safely during disruptions
- Example contents:
- 1L water bottle + filter straw
- 1 meal + snacks
- Light first aid kit
- Map, compass
- Folding poncho + gloves
✅ Level 3: 72-Hour Kit (Bug Out Bag / Emergency Kit)
- Core emergency kit for major disruptions
- Purpose: sustain life for 3 days
- Includes all categories covered in Section 1
✅ Level 4: Long-Term Shelter Kit
- Stored at home or bug out location
- Purpose: 2–4 weeks self-reliance
- Includes water barrels, bulk food, heating, backup power
🧠 The modular approach keeps you agile. You don’t carry everything—only what the situation demands.
🚶♂️ 2. Mobility vs. Durability: Choosing the Right Bag
Many beginners start with a cheap backpack from the closet. It works—for a while. But when your life may depend on it, your bag must match your body, your terrain, and your crisis profile.
🟢 What to Look For:
- Comfortable straps with chest + hip support
- Water-resistant or waterproof material
- MOLLE webbing (modular expansion)
- Separate compartments + compression straps
🔴 What to Avoid:
- Tactical overload (military look can make you a target)
- Poor stitching or weak zippers
- Over-reliance on bulky frames unless wilderness trekking
🔍 Pro Tip: Choose a grey man style pack—non-threatening, civilian look. In urban collapse scenarios, staying invisible is an advantage.
🌍 3. Scenario-Based Loadouts: Practical Configurations
Each threat brings different priorities. Let’s break down how to reconfigure your emergency kit essentials based on the crisis:
🔥 Scenario: Fast Evacuation (Wildfire, Civil Unrest)
Objective: Move quickly, stay light, navigate chaos.
Must-have items:
- Respirator mask (N95 minimum)
- Compact map + GPS backup
- External battery bank
- Local cash (small bills)
- Emergency radio (compact)
Don’t pack:
- Large cooking gear
- Heavy water storage (go with filters instead)
🌪️ Scenario: Shelter-in-Place (Hurricane, Pandemic, Grid Down)
Objective: Sustain life for multiple days in one location.
Must-have items:
- Extra water storage (5–10 gallons)
- Heat source (camp stove, candles, solar oven)
- Entertainment (books, games to avoid mental fatigue)
- Comfort items (pillows, food seasonings)
Don’t pack:
- Portable tent or bedroll (unless infrastructure compromised)
❄️ Scenario: Cold Climate Emergency
Objective: Prevent hypothermia and preserve calories.
Must-have items:
- Insulated bivvy sack
- Chemical hand/foot warmers
- Layered wool clothing
- Fatty/high-calorie rations (jerky, nuts, ghee packets)
🧠 Remember: You lose up to 50% of body heat through your head—pack a good beanie.
🏙️ Scenario: Urban Grid Failure or Cyber Attack
Objective: Navigate collapsed infrastructure without becoming a target.
Must-have items:
- Burner phone with prepaid minutes
- Concealed self-defense (pepper spray, flashlight baton)
- Small crowbar or pry tool
- Personal ID + paper copies
- Local emergency frequency list
Don’t pack:
- Flashy, tactical-looking gear
📦 4. Prepping for Households, Kids, and Pets
Emergency planning isn’t one-size-fits-all. Households with children, elderly members, or pets require additional gear and planning.
For Children:
- Smaller versions of items (child-sized masks, gloves)
- Comfort item (plush toy, coloring book)
- Pediatric medication
- Extra diapers + wipes
For Seniors:
- Duplicates of medication + glasses
- Portable mobility aid (folding cane, extra batteries for scooters)
- Easy-open food pouches
For Pets:
- Collapsible food/water bowls
- 3-day food supply
- Leash + carrier
- Familiar item (blanket, toy)
🧠 In chaos, children and animals respond to familiarity. One soft toy or treat can prevent panic.
🔁 5. Pre-Made Kits vs. DIY: What’s the Best Option?
You’ve seen them online—$300 pre-packed bug out bags with flashy tools and branded gear. But are they worth it?
✅ Pre-Made Kits: Pros
- Convenience, saves time
- Great for absolute beginners
- Often compact and waterproof
❌ Pre-Made Kits: Cons
- Lack customization
- Often contain low-quality gear
- Miss critical items like prescriptions or local maps
🛠️ DIY Kit: Pros
- Tailored to your climate, health, and needs
- You know exactly what’s inside
- Easier to rotate and upgrade over time
💡 Hybrid Tip: Start with a minimalist pre-made kit, then build around it with personalized upgrades.
🧠 Mindset Matters: Why Gear Isn’t Enough
Having gear doesn’t equal survival. Mindset, training, and muscle memory are just as critical. Practice using every item in your emergency kit:
- 🔦 Turn your flashlight on without looking
- 🧭 Navigate with a paper map with the GPS off
- ⛑️ Apply bandages one-handed in case of injury
- 🔪 Open your multi-tool in the dark
🎯 A crisis is no time to read instruction manuals. If you haven’t used it, you don’t really own it.
Preparedness Is a Process: Building, Testing, and Evolving Your Emergency Kit Over Time
The truth about emergency preparedness is this: your kit is never finished. It’s not a one-time task you can check off a to-do list. It’s a living system. Your needs, your environment, your threats—all evolve. So should your gear. Whether you’re prepping for hurricanes, cyberattacks, or civil unrest, your emergency kit essentials must be dynamic, not static.
Let’s break down how to maintain, test, and evolve your setup like a true survivalist.
🔁 1. The 3-Month Rule: Regular Kit Maintenance
You wouldn’t drive a car for years without an oil change. So why leave your emergency kit untouched?
Every 3 months, follow this check-and-refresh ritual:
✅ Supplies:
- Replace expired food and medication
- Test flashlight, batteries, radios
- Replenish any used first aid items
- Rotate water storage (especially open containers)
✅ Seasonal Update:
- Swap clothing for climate
- Add sun protection or cold-weather gear
- Adjust calorie load for energy needs
✅ Documentation:
- Update emergency contacts
- Revise maps, routes, and meeting points
- Reprint any lost or damaged ID copies
🔧 Pro Tip: Set calendar reminders—tie your kit check to the start of each season.
🔬 2. Stress Testing Your Kit: Simulate the Real Thing
It’s easy to feel “ready” in theory. But real stress exposes flaws. That’s why stress-testing your gear is crucial.
Try these simulations:
🕯️ Power Outage Drill
- Shut down electricity for 12–24 hours
- Cook one meal using only your kit
- Use backup lighting only
- Charge a phone using your solar setup
🚶 Bug Out Simulation
- Walk 2–5 kilometers with your full kit
- Time how long you can go before fatigue
- Note what’s unused vs. essential
🧭 Navigation Run
- Use only printed maps and a compass
- Navigate to 3 landmarks in your area
- Try this during poor weather or low light
🧠 The goal isn’t to suffer. It’s to uncover weak points—before they matter.
⚖️ 3. The Psychology of Preparedness: Why Your Kit Is Also Mental Armor
Your emergency kit is more than gear. It’s a psychological anchor. When the world spins into chaos, having a physical, familiar, and reliable setup restores control.
Here’s why it matters:
- Reduces panic by providing action steps
- Helps children and family feel secure
- Keeps you focused on what can be done, not what’s lost
What to include for psychological resilience:
- Comfort item (photos, letter, small token)
- Notebook for journaling stress or recording events
- Book or game for mental distraction
- Simple rituals: prepping a hot drink, reviewing a checklist
🎯 In a crisis, calm is currency. Your kit helps buy it.
🗺️ 4. Localizing Your Kit: What Works in One Place May Fail in Another
Disasters aren’t universal. Your emergency kit essentials should reflect your geography, your threats, and your lifestyle.
Let’s explore real-life differences:
| Region | Unique Risks | Kit Adaptations |
|---|---|---|
| Coastal (e.g. Florida) | Hurricanes, floods | Waterproof bags, water pumps, floatation gear |
| Urban (e.g. NYC) | Grid outages, riots | Maps, burner phone, self-defense tools |
| Rural (e.g. Midwest) | Tornadoes, isolation | Communication backup, livestock support, food stockpile |
| Desert (e.g. Arizona) | Heat, limited water | Electrolytes, UV protection, extended water storage |
| Cold (e.g. Alaska) | Hypothermia, ice storms | Heat packs, layered gear, snow shelter components |
📍 Know your local risks. Read your region’s FEMA guides. Adjust accordingly.
🤝 5. Community Readiness: You Can’t Survive Alone
No matter how well-packed your kit is, survival isn’t a solo sport. Building mutual aid connections increases resilience exponentially.
Ways to extend preparedness:
- Coordinate kits with neighbors (avoid overlap)
- Host kit-building workshops (community centers, schools)
- Create shared resource pools (tools, water barrels, radios)
- Map your block: who’s vulnerable, who has skills?
🧠 A lone wolf dies alone. A prepared community survives together.
📦 6. Digital Additions to Your Kit
Digital tools can be part of your emergency arsenal—if you prep for when power and data fail.
Recommended apps (download + offline mode):
- Offline maps (OsmAnd, Maps.me)
- First aid guide (Red Cross app)
- Disaster alerts (FEMA, MyRadar)
- Signal messenger (end-to-end encrypted)
Backup your data:
- Emergency plan stored on USB + printed copy
- Encrypted backup of documents (ID scans, insurance, meds)
🔌 Digital tools help—but only if charged and accessible offline.
✅ Final Reality Check: Are You Really Ready?
Ask yourself the hard questions:
- Could I survive 72 hours with my current kit?
- Can I carry it 5 km in bad weather?
- Does every family member know where it is?
- Could I survive without digital tools?
If any answer is “no,” don’t panic. That’s where progress starts.
🧭 Preparedness is a habit, not a finish line.
🔚 Wrapping It All Together
Emergency kit essentials are not about fear—they’re about freedom. When you’ve built and tested a kit tailored to your life, you earn more than safety. You earn confidence, control, and the ability to act when others freeze.
Whether it’s a blackout or a wildfire, a cyberattack or a snowstorm, your emergency kit is your first line of defense.
So build it. Test it. Trust it.
And when the sirens sound, you won’t be scrambling.
You’ll already be moving.
❓ Frequently Asked Questions (FAQ) – emergency kit essentials
Q1: What’s the minimum I need to survive 72 hours?
At a bare minimum, your 72-hour kit should include:
- Water: 3 liters per day per person
- Food: high-calorie, low-prep rations
- Light source: flashlight or headlamp with batteries
- First aid: basic kit + your essential medications
- Shelter: emergency blanket or bivvy bag
- Communication: battery-free NOAA radio
- Identification: copies of ID and emergency contacts
This is your foundational layer. Everything else enhances efficiency and comfort, but these are the true emergency kit essentials.
Q2: How often should I update or check my emergency kit?
Ideally, every 3 months. This gives you a rhythm aligned with seasonal changes. Here’s what to check:
- Expiration dates on food, medicine, batteries
- Functionality of electronics (flashlights, radios)
- Seasonal clothing needs (swap summer/winter gear)
- Family changes (new baby, new pet, changed meds)
Many preppers tie this to the equinox and solstice to stay consistent.
Q3: What’s better — a bug out bag or a shelter-in-place kit?
Both serve different purposes:
- A bug out bag is mobile. It’s designed for evacuating fast, usually on foot or by vehicle.
- A shelter-in-place kit is heavier, bulkier, and tailored to staying put safely during crises like blizzards, chemical spills, or civil unrest.
The ideal? Have both, or build a hybrid with detachable modules.
🎯 Mobility vs. sustainability — your emergency kit essentials should cover both scenarios.
Q4: Can I use a hiking backpack or gym bag as an emergency kit?
You can, but it depends on the quality and design. Consider:
- Durability: Can it survive heavy rain, rough handling?
- Ergonomics: Padded straps, chest and waist support?
- Compartments: Easy access to categories of gear?
- Stealth: Tactical-looking bags may draw unwanted attention in civil crises.
A gym bag might work as a home-only kit, but not for bugging out. For field use, invest in a grey man backpack: neutral color, rugged, unassuming.
Q5: Should kids and elderly people have their own emergency kits?
Absolutely—but adapt them:
For kids:
- Smaller sizes and lighter loads
- Essentials: snacks, water pouch, flashlight, ID card, comfort toy
- Child-size mask and gloves
For elderly:
- Duplicate meds + glasses
- Easy-to-open containers
- Lightweight tools
- Clear emergency plan printed in large font
Your emergency kit essentials must reflect the capabilities of the person carrying them. It’s not about “one bag for everyone” — it’s about tailoring for survival.
Q6: What items are often forgotten in emergency kits?
Here’s a list of commonly overlooked but critical items:
- Prescription medications (especially for chronic conditions)
- Cash (ATMs may not work)
- Backup power (solar charger, power bank)
- Sanitation supplies (wipes, trash bags, soap)
- Comfort items (book, photos, tea)
- Local paper map (don’t rely on GPS alone)
💡 When panic strikes, the smallest item can bring the greatest calm.
Q7: What if I can’t afford to build a full kit all at once?
Start small and strategic. Focus on survival priorities in this order:
- Water
- Food
- Warmth/shelter
- First aid
- Light
- Comms
Use dollar stores, army surplus shops, and second-hand gear. Build a little each week — one new item every paycheck. Keep your kit visible so you stay motivated.
🧠 Preparedness isn’t expensive. Complacency is.
